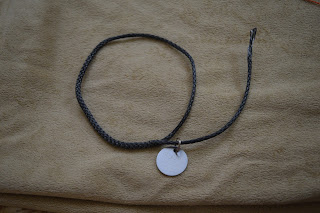
This is a very simple project that results in a clean, durable and low-profile tag holder. I use 7/64 Amsteel Blue, a braided rope with a breaking strength of about 1600lb, but any hollow braided rope will work. Because the rope is relatively thin and has an incredible breaking strength, I ensure that my tag holders will easily slip over Robin's head if he were to get caught on something.
Time: 5 - 10 minutes. It's complicated to explain but very easy to do.
Materials: Scissors, a length of fine wire 10- 15" long folded in half, and appropriate rope.
1. Measure out a length of rope that could easily slip over your dog's head. Double that length and cut.
2. Splicing rope (threading rope through itself) is easier when the ends are tapered. To taper, measure in 1 inch from the end and open up the rope by grasping on each side of the 1" mark and pushing hands together. Using wire, pull out and cut off every other strand (on 8 strand Amsteel, this is 4 strands) so that at the 1" point, the width of the rope is reduced by half. Repeat on the other end.
3. Fold the length of rope in half and find the midpoint. Expand the rope at that point. Fold each half again, about 1-1.5" off the halfway point, and expand rope at the fold points.
The second two points can be tweaked (collar can be taken out and re-spliced multiple times if necessary) if the collar ends up being too tight for the dog due to the increased thickness of the rope when it is spliced. If the collar is too tight, bring the second fold points closer to the ends of the rope.
4. Coil the rope. The two ends will be spliced inside the main loop to create a continuous loop. To accomplish this, the splicing tool will enter through point A in the photo below and exit through point B.
5. Insert the folded end of the splicing tool into point A and push through the core of the rope to point B, poking the loop out between the strands. Ensure that the splicing tool does not bisect any strands of the rope. Bend the ends of the splicing tool so that it does not slip into the rope.
6. Thread the tapered ends of the rope into the loop of the splicing tool at the halfway point of the taper. Gently pull the splicing tool back through to point A, pulling the end of the rope through the core of the main rope. Pull the splicing tool and rope end completely out at point A and roll the tapered strands between your fingers to smooth them out.
8. Thread the ring of the tag onto the free end of the rope and repeat the splicing by threading the splicing tool in through point A and out as close as possible to the connection point at point B.
Time: 5 - 10 minutes. It's complicated to explain but very easy to do.
Materials: Scissors, a length of fine wire 10- 15" long folded in half, and appropriate rope.
1. Measure out a length of rope that could easily slip over your dog's head. Double that length and cut.
2. Splicing rope (threading rope through itself) is easier when the ends are tapered. To taper, measure in 1 inch from the end and open up the rope by grasping on each side of the 1" mark and pushing hands together. Using wire, pull out and cut off every other strand (on 8 strand Amsteel, this is 4 strands) so that at the 1" point, the width of the rope is reduced by half. Repeat on the other end.
 |
| Open up rope |
 |
| Pull every other strand out of braid |
 |
| Cut off strands to reduce diameter by half |
The second two points can be tweaked (collar can be taken out and re-spliced multiple times if necessary) if the collar ends up being too tight for the dog due to the increased thickness of the rope when it is spliced. If the collar is too tight, bring the second fold points closer to the ends of the rope.
6. Thread the tapered ends of the rope into the loop of the splicing tool at the halfway point of the taper. Gently pull the splicing tool back through to point A, pulling the end of the rope through the core of the main rope. Pull the splicing tool and rope end completely out at point A and roll the tapered strands between your fingers to smooth them out.
7. Adjust the size of the loop so that the remaining opened point B on the rope meets up with the edge of the encased rope. Smooth the rope so that the loose ends disappear into the encasing rope. At this point, try the collar on the dog. It should fit a little looser than originally measured at this point. If not, go back and adjust the placement of point B in Step 3.
8. Thread the ring of the tag onto the free end of the rope and repeat the splicing by threading the splicing tool in through point A and out as close as possible to the connection point at point B.
 |
| Add the tag. |
 |
The loop of the splicing tool should exit as close as possible
to the beginning of the completed splice.
|
9. Pull tight on the spliced end to cinch the splice around the tag before smoothing the end into the rope.


No comments:
Post a Comment